The Camera and the Game Plane
So my first task for the shooter was to get that Ikaruga-style camera motion. The one where the camera flies around in the level, but the gameplay stays fixed to your view.
UE4 Matinee
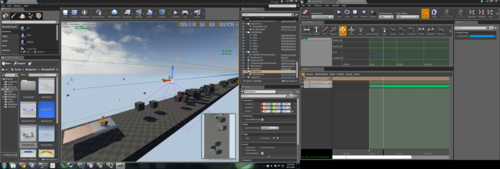
Unreal has the perfect set of controls for driving the camera around the level, in their Matinee editor. It’s kind of a cutscene editor, but can be used to script game events like doors opening and whatever too. There’s a neat example project that hows off some of its capabilities, but long store short: I can use it to drive the camera around the level with a bunch of keyframes. So I’m using it.
The Game Plane
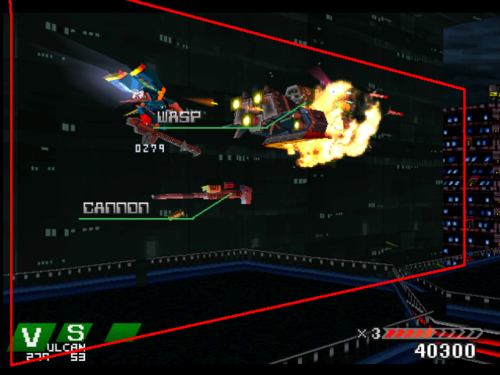
So I have the camera, and it’s flying around the level. The easy thing to do now is just to parent all the gameplay actors to the camera, give them a fixed depth from the camera, and do all the action in camera-space. But what about games like Einhander? In its first level it turns the camera independent of the 2D plane that all the action is happening on, and even has actors visibly transitioning onto the plane. Video here.
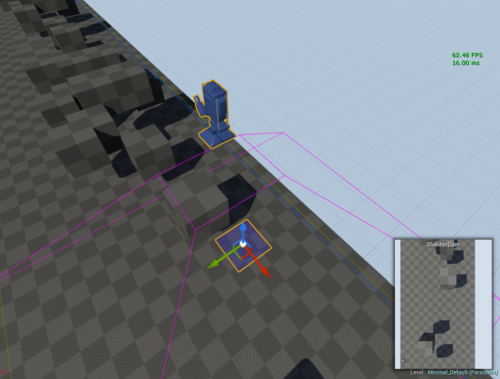
Here’s a screenshot showing a rough outline of the playable area in red.
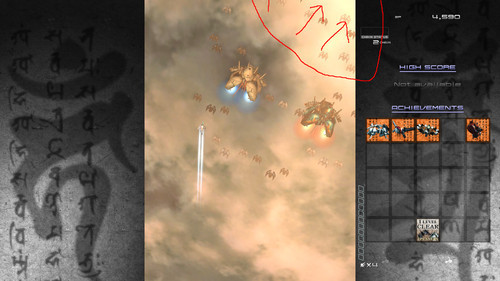
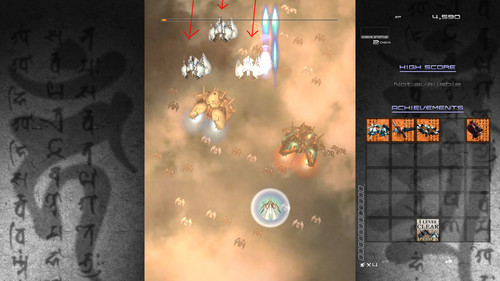
Even Ikaruga often hides its enemy-transition-to-gameplay by having background baddies run off the edge of the screen, only to reappear on the same edge, now suddenly on an alignment where you can shoot them.
So I made the decision to split the gameplay plane and camera, allowing them to be moved independently of each other.
Of course, that introduces more weird issues. Now how do we constrain the player movement? We could just limit their movement to some area on the plane. But every time the camera looks at a weird angle your bounds area is going to turn into, effectively, a trapezoid. What if we wanted to do stuff like zooming out the camera and giving the player a wider area, or expressing a tight passageway by zooming in and constraining the player to the view?
Einhander didn’t do this and just had the player limited to the plane in 3D space, regardless of camera and view behavior.
Now the math gets interesting
First, some terms...
View space is the coordinate space where everything is relative to the camera, in world-space units. The camera is at 0,0,0 and looking down some axis (often Z) with the camera’s “up” direction also being along some axis (often Y).
To go from world space to view space, we can just transform things by the inverse of the camera matrix. Even better than that, because we aren’t worried about scale - only position and rotation - UE4 can “unrotate” a vector, and we can just subtract the camera’s position vector. This is almost certainly way faster than calculating the inverse of a matrix.
Clip space is the coordinate space that corresponds to your screen. -1,1 is the upper left corner, and 1,-1 is the lower-right corner. The X axis is horizontal, and the Y axis is vertical. This is after the perspective transformation, so at this point things that are further away from the camera have been shifted towards the center of the screen. The Z value is depth in clip-space, and it’s either in the range of 0 to 1 or -1 to 1.
Here’s information on setting up an OpenGL Projection Matrix, and what all the numbers mean. This transformation will take us from view space to clip space.
And now the math...
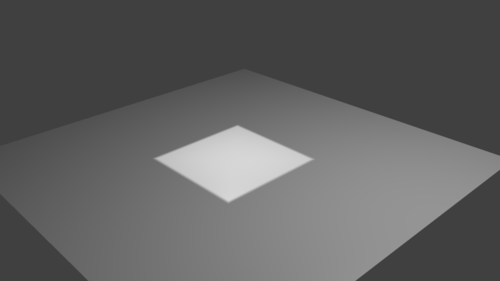
So if the camera is always looking straight at the plane, it’s pretty straightforward. We can just clamp the coordinates of the player in view-space. We just need to figure out how big the gameplay area is at that distance from the camera. There’s a little bit of math behind that, but I’m not going into it because it’s no the approach I went with. I don’t want to be constrained to cases where the camera is facing the plane perfectly like this (gameplay plane in medium-gray, viewable area in lighter-grey)...
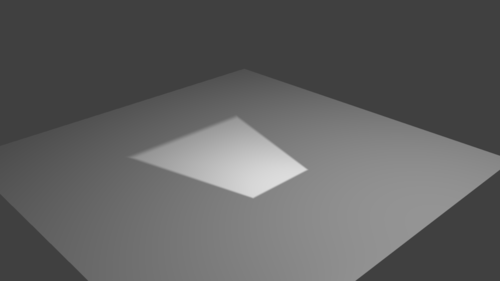
I want to be able to handle situations where the camera is facing the plane at an angle, causing the actual playable area to become a trapezoid in world space like this...
So the first approach I tried was to convert the coordinates of our player (or whatever other actor we want constrained here) to clip space, clamp it to that -1,-1 to 1,1 area that represents your screen, and then convert it back. The problem with this is that by NOT changing the depth (Z) component of the vector, we have actually moved something off of the plane by doing this. Think about it, the camera is looking at it from some weird angle. If we scoot something directly sideways in the view, it’s going to move off the plane.
I ended up doing the math later on to snap something onto the gameplay plane without moving it relative the view, but it was after I had abandoned this approach.
The main reason for giving up on that was the fact that things got REALLY weird for anything that ended up behind the camera or on the same plane as Z=0 in clip space.
Something Simpler
It’s pretty easy to figure out the screen bounds for some plane in view space. (Copy+Pasted from the code. X is depth in this case!)
float YMax =
    tan((PI / 180.0f) * Camera->FieldOfView / 2.0f) * ViewSpace.X;
float ZMax =
    tan((PI / 180.0f) * (Camera->FieldOfView / Camera->AspectRatio) / 2.0f) * ViewSpace.X;
The maximum bound for each axis is specified there and, because everything’s centered around 0,0, that means the negative bound is just negative YMax, ZMax.
So we clamp the object’s view-space coordinates like that, and then snap it back onto the gameplay plane (while keeping its position in screen-space!)
In gameplay-plane space, with the camera position being “Start” and the actor’s current position being “End”, the function for doing that is this:
FVector UExpopShooterMath::ProjectToZPlane(FVector Start, FVector End)
{
    float t = (Start.Z * -1) / (End.Z - Start.Z);
    FVector FromStartToPoint = (End - Start) * t;
    return FromStartToPoint + Start;
}
And bam. We have our gameplay area defined by the visible area of the gameplay plane object.
Note: This article originally appeared on my Tumblr and was reposted here in 2019.
